Task queues in HubSpot organize outreach-related tasks — such as calls, emails, follow-ups, and meetings — into labeled groups so sales teams can work through them one after another without manually searching the CRM. They are especially useful for sales development reps (SDRs) and account executives who perform large volumes of repetitive outreach, renewal checks, onboarding tasks, or follow-up sequences. This step-by-step guide explains how to create task queues, assign tasks, work through them in sequence, and optimize them for daily use in HubSpot Sales Hub.
Table of Contents
What are HubSpot task queues?
A task queue is a label that groups tasks so you can filter, view, and work through them together. Queues help you batch-process similar activities, such as “Daily Outbound Calls,” “Renewal Follow-Ups,” or “Onboarding Emails.”
Each HubSpot user can create up to 20 task queues per account. Task queues are available in HubSpot Sales Hub, typically in Professional and Enterprise tiers, depending on your plan and portal settings.
Step 1: Log in to your HubSpot account
Start by logging into HubSpot so you can access tasks and queues.
Open your browser and go to https://app.hubspot.com.
Click Log in.
Enter your email and password.
After logging in, you land on the HubSpot dashboard.
From there, navigate to CRM → Tasks to start building and managing task queues.
Step 2: Open the Tasks tool
To create and manage task queues, you must first open the Tasks dashboard.
In the top navigation bar, click CRM → Tasks.
The Tasks dashboard appears, showing all your assigned tasks.
Make sure you are on the Tasks tab (or the main task list) in your workspace.
This page lets you create, filter, edit, and organize tasks — and also manage your task queues.
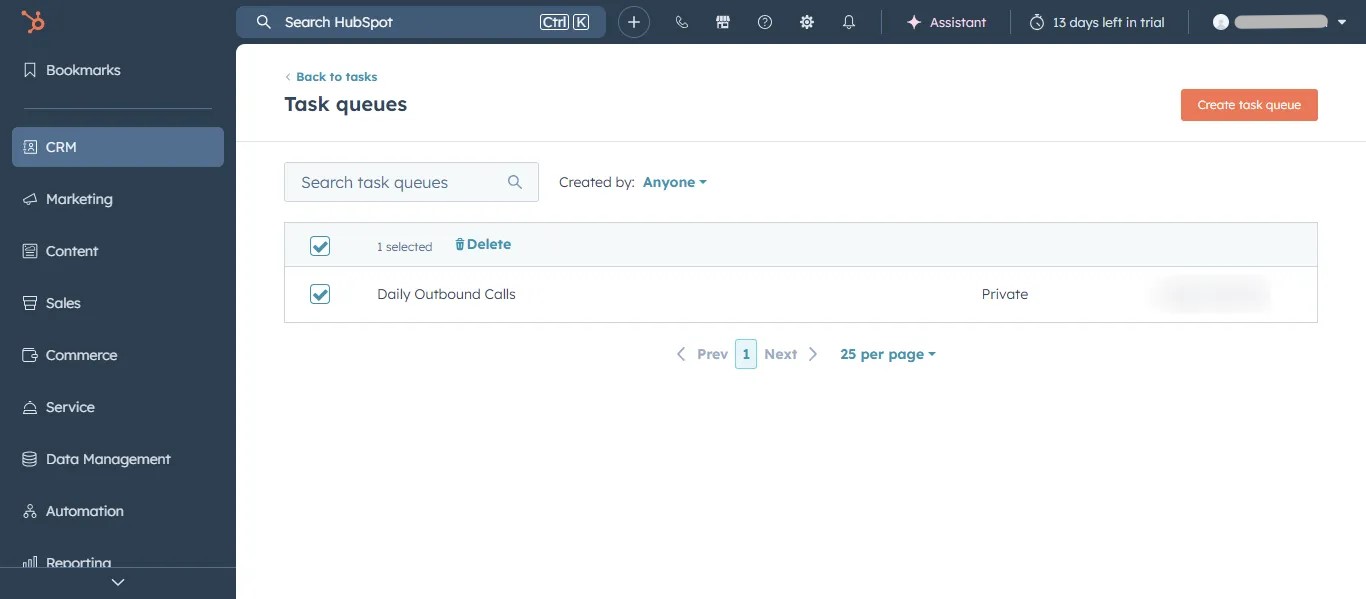
Step 3: Create a new task queue
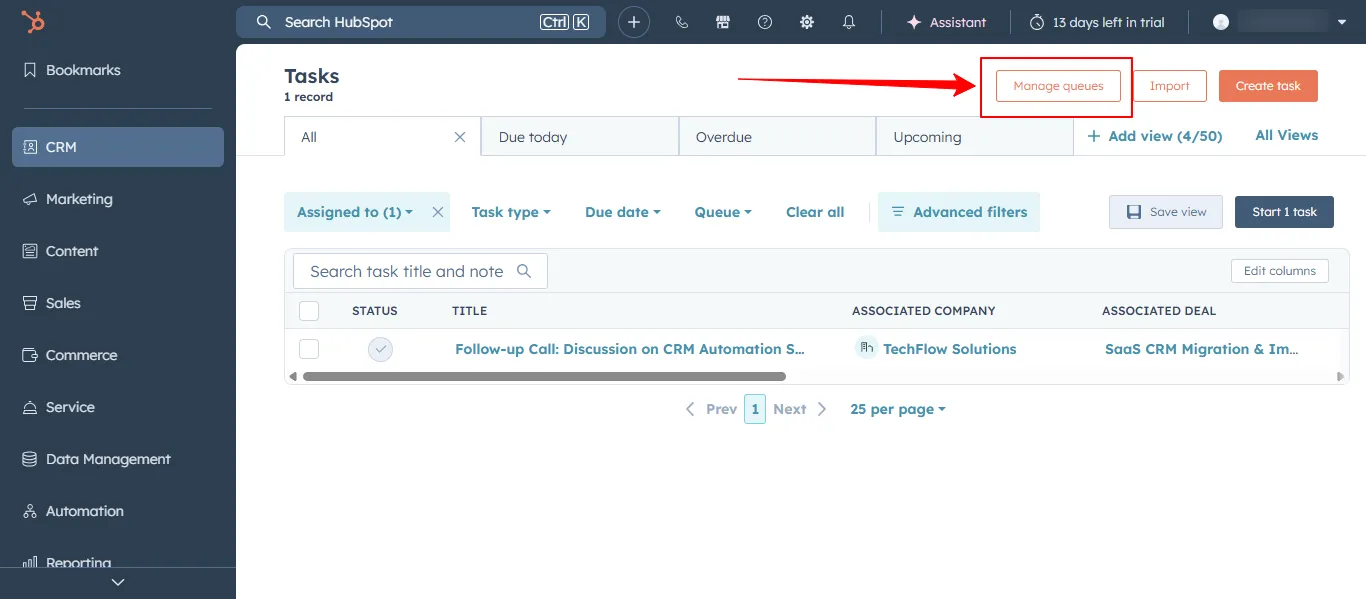
Queues are created from the queue management panel, not the main task list.
In the Tasks dashboard, click Manage queues (top-right button).
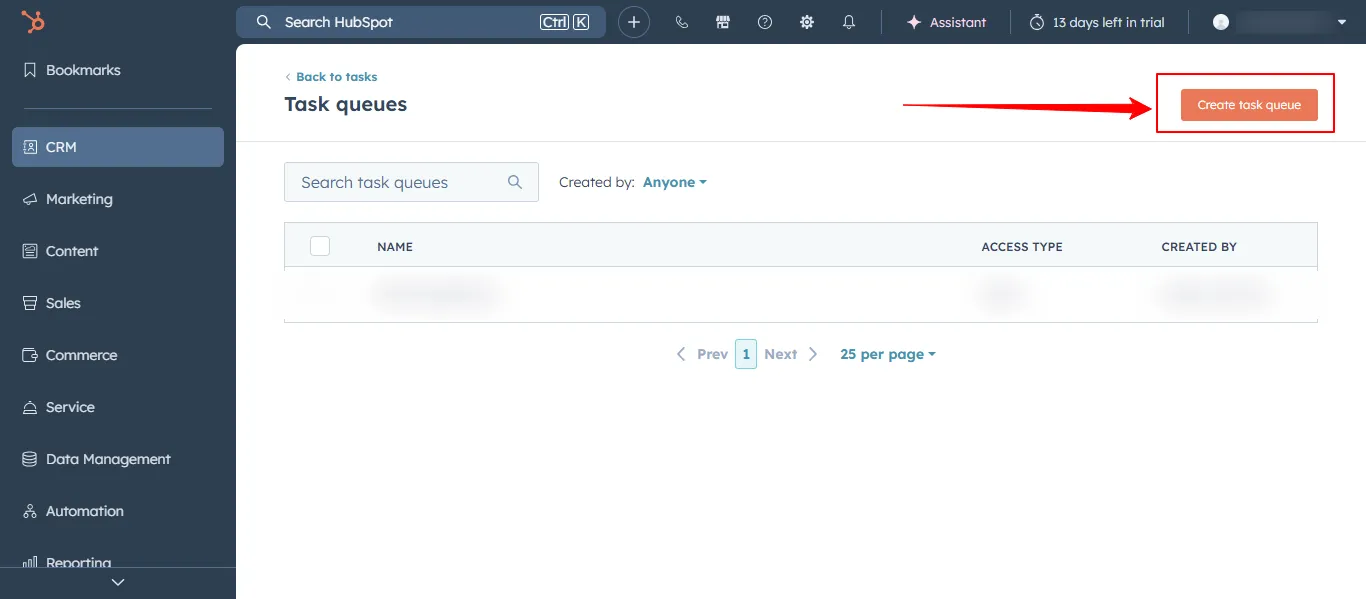
In the right-hand panel, click Create task queue.
Enter a queue name, such as:
Daily Outbound Calls
Follow-Up Emails
Q2 Renewal Tasks
Choose visibility (Private or Shared, depending on your workflow).
Click Save.
The queue now appears in your Queue filter list and can be used when creating or assigning tasks.
Step 4: Add tasks to a queue
You can add tasks to a queue when creating them or by bulk-editing existing tasks.
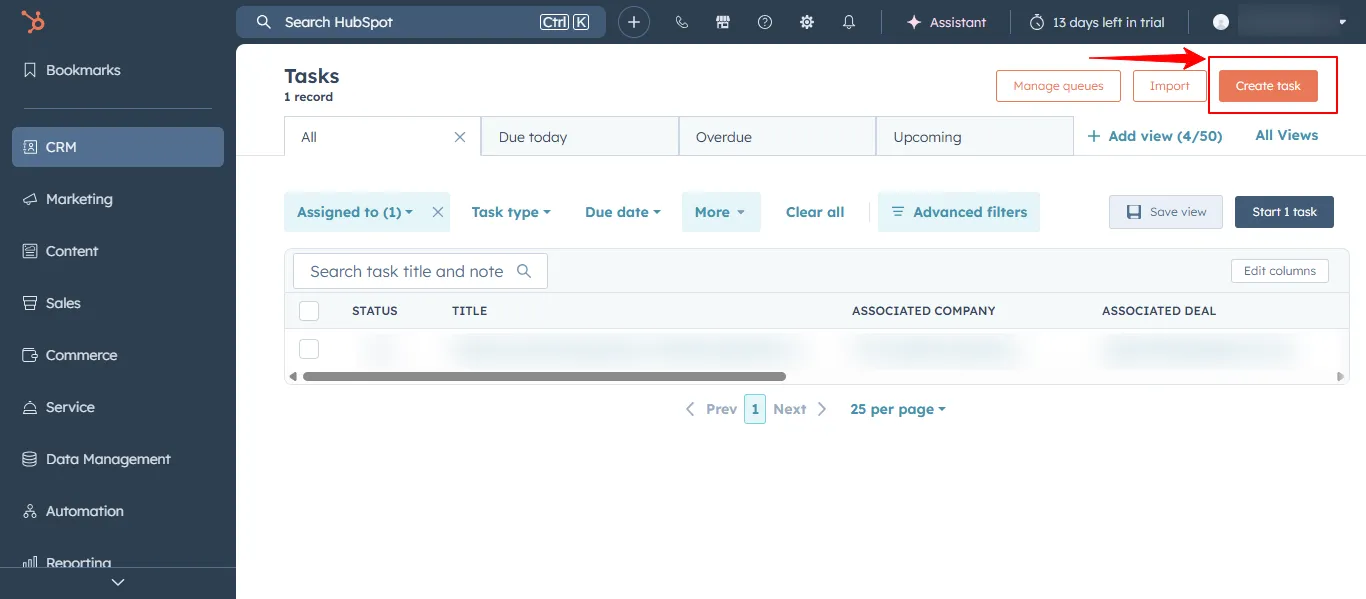
Option A: Add a new task to a queue
In the Tasks dashboard, click Create task (top-right).
Fill in the task details:
Task type (call, email, meeting, to-do, etc.)
Due date
Priority (low/medium/high)
Assigned to
Associations (contact, company, deal, etc.)
In the Queue dropdown, select your queue (e.g., Daily Outbound Calls).
Click Create (or Save, depending on layout).
The task now belongs to that queue and will appear when you filter by it.
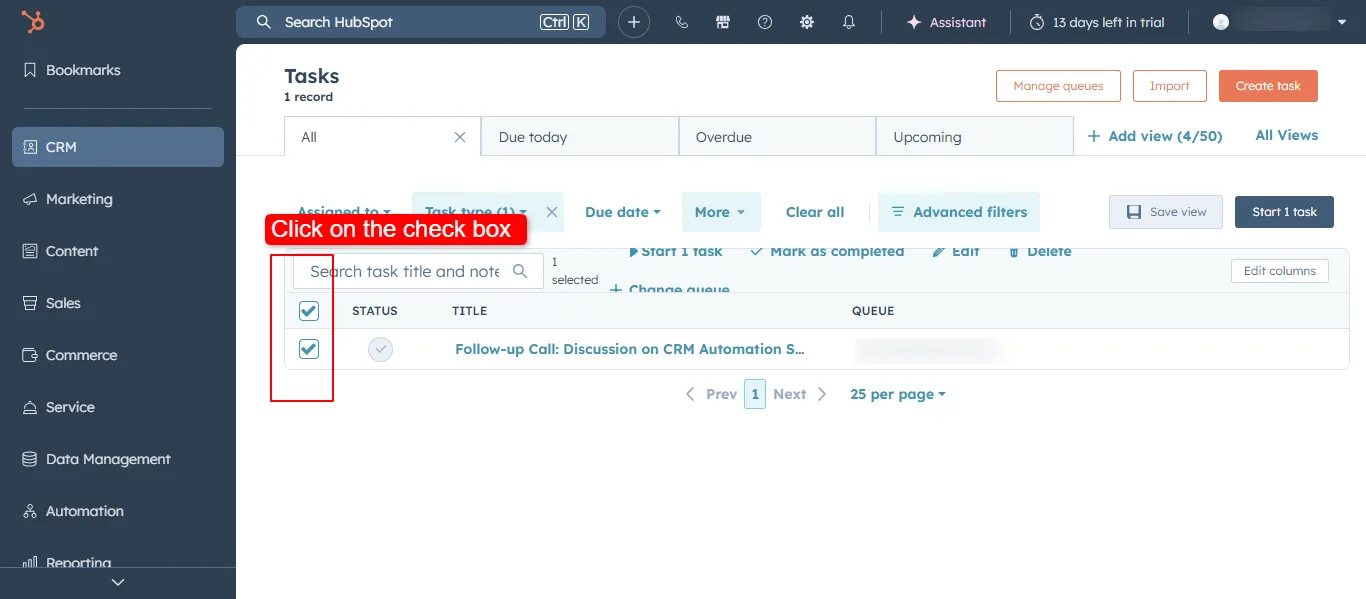
Option B: Add existing tasks to a queue
In the Tasks dashboard, select the checkboxes next to the tasks you want to add.
Click Change queue (or similar bulk-edit button at the top of the list).
Choose your queue from the Queue dropdown.
Click Save.
All selected tasks are now grouped under the same queue for easy sequencing.
Step 5: Start working through a queue (start queue mode)
Once tasks are in a queue, you can work through them one-by-one automatically.
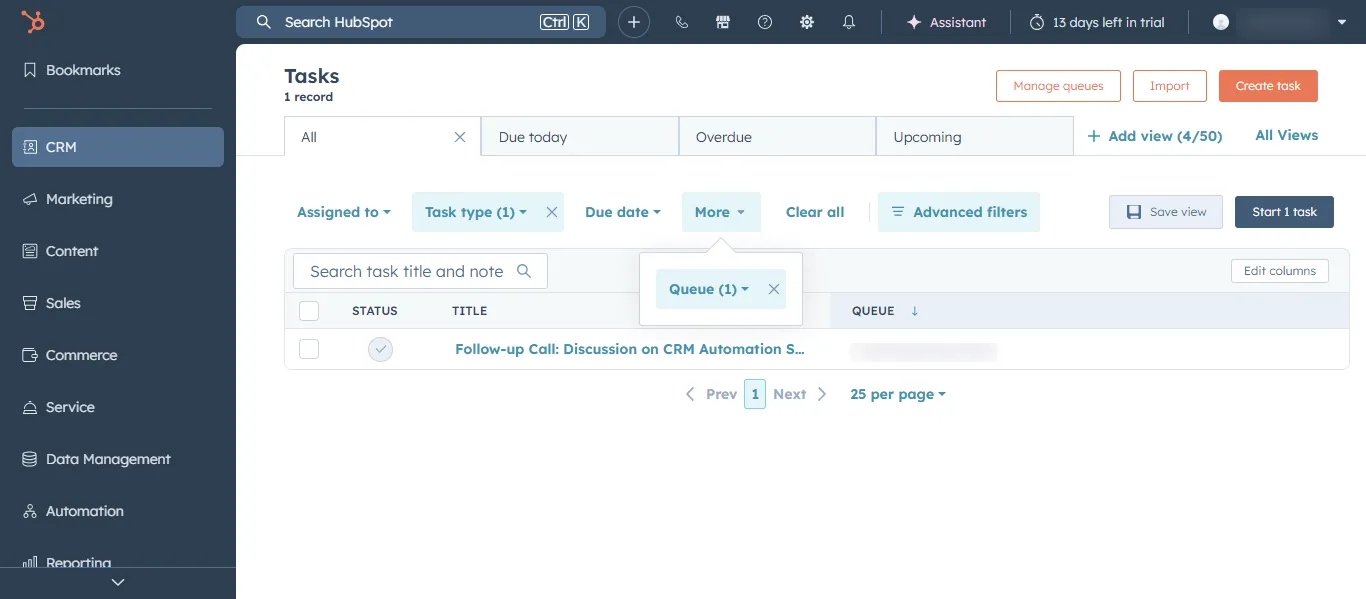
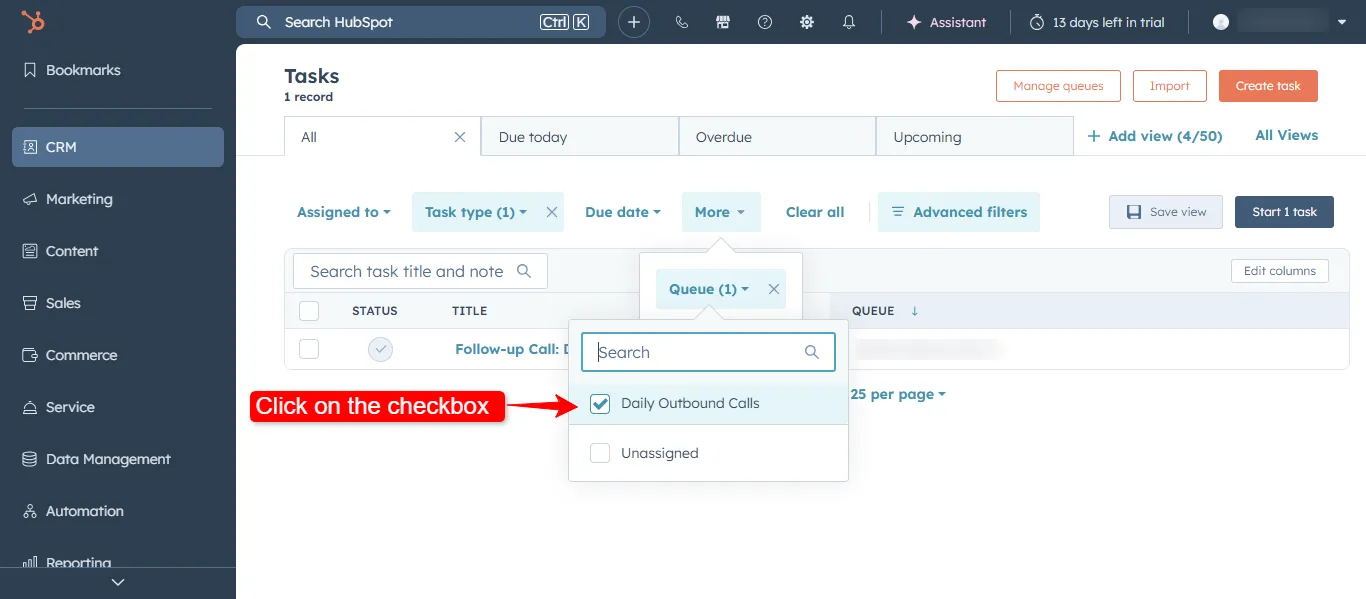
In the Tasks dashboard, click the Queue filter above the task table.
Select the checkbox for your queue (e.g., Daily Outbound Calls).
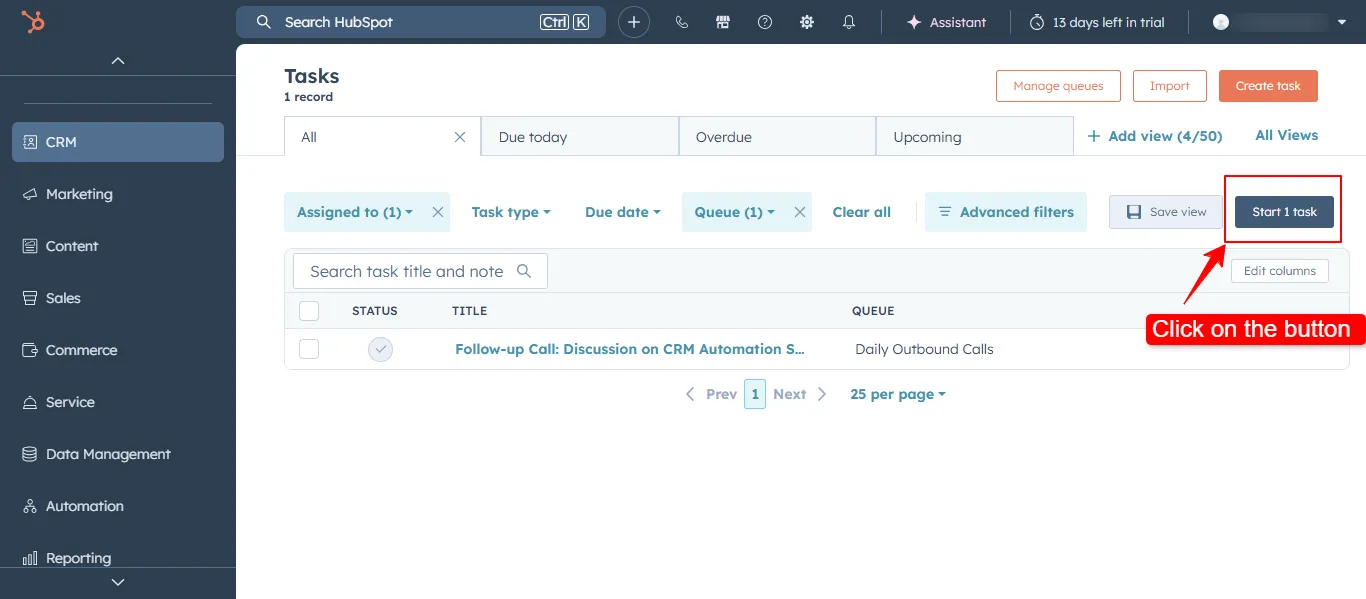
Click Start queue (or the equivalent queue-start button).
HubSpot opens the first task in the queue. After you complete it, the next task automatically loads, helping you move through the list without manual navigation.
Step 6: Complete tasks in the queue
Each task in the queue may involve different actions: calling a contact, sending an email, logging an activity, or scheduling a meeting.
To complete a task in the queue:
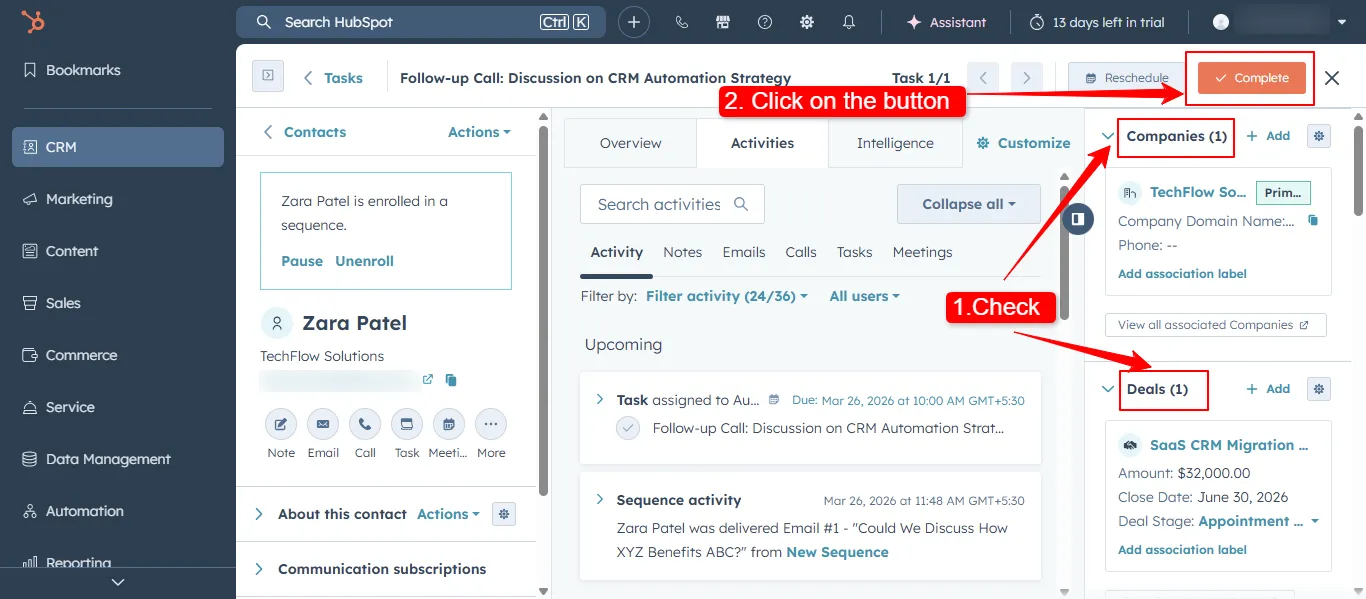
Review the contact, company, and deal details shown on the record.
Perform the required activity (call, email, Zoom meeting, etc.).
Add notes or activity logs on the record (e.g., “Left voicemail,” “Scheduled demo”).
Click Complete task (or Mark as done) in the task panel.
The next task in the queue then opens automatically, maintaining a smooth, uninterrupted workflow.
Step 7: Manage and optimize your task queues
Queues should be reviewed and updated regularly to keep outreach efficient and aligned with campaigns.
You can manage queues by:
Adding new tasks to existing queues (via Create task or bulk-edit).
Removing or reassigning completed or outdated tasks.
Editing queue names (e.g., from Q1 Outbound to Q2 Renewals).
Filtering tasks by due date, priority, or owner inside a queue.
Well-organized queues help sales teams reduce context-switching, stay disciplined with cadences, and hit outreach targets consistently.
Best practices for using task queues
Group similar tasks (calls, emails, follow-ups) into separate queues so reps can focus on one activity type at a time.
Use queues for daily blocks, such as “Morning Call Block,” “Afternoon Follow-Ups,” or “Renewal Outreach.”
Prioritize by due date and urgency so high-value tasks are at the top of the queue.
Complete tasks immediately after performing the activity to keep the queue flowing smoothly.
Review queue progress during the day (e.g., using views or dashboards) to track completion rates.
Task queues are available in HubSpot Sales Hub, typically in Professional and Enterprise plans. Exact permissions may vary by portal settings and user role.
Yes. You can configure workflows to create tasks and assign them to specific queues (via the Queue field), enabling automated sequencing for cadences, follow‑ups, and renewal reminders.
Yes. In Manage queues, you can edit the name, change visibility, or delete a queue. Deleting a queue does not delete tasks; it only removes the queue label from them.